Introduction
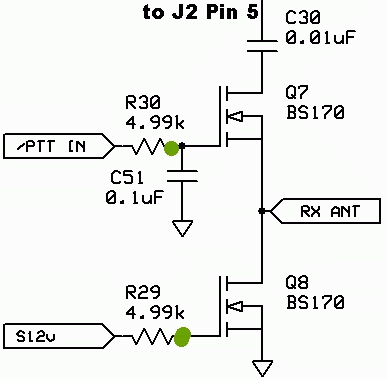
This stage handles the muting of the RX section when I PTT goes high. When RX Mute is High, the RX Mixer is disabled; when RX Mute goes low (the normal power up value), the RX Mixer is enabled. The circuit also handles the switching of the antenna path from the PAF board, via J2 Pin 5 into the RX through the two FETs (Q7 and Q8)
Schematic
(Click for full TX Schematic) (Click for full RX Schematic)
Summary Build Notes
- Install Ceramic cap C30
- Install Resistors R29-R30
- Install Q7 and Q8
- Test the Stage
Bill of Materials
| Check | Designation | Component | (Color) Code | Type | Qty | Notes |
|---|---|---|---|---|---|---|
| [__] | C30 | 0.01 uF | 103 | ceramic | 1 | |
| [__] | R29 | 4.99 k | yellow-white-white-brown-brown | Resistor 1% | 1 | W-E |
| [__] | R30 | 4.99 k | yellow-white-white-brown-brown | Resistor 1% | 1 | S-N |
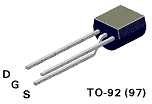
| [__] | Q7 | BS170 | TO-92 Transistor (N-Channel, FET) | 1 | ||
| [__] | Q8 | BS170 | TO-92 Transistor (N-Channel, FET) | 1 |
Detailed Build Notes
- Install C30, R29-R30, and Q7-Q8
- Exercise ESD precautions with the BS170 transistors
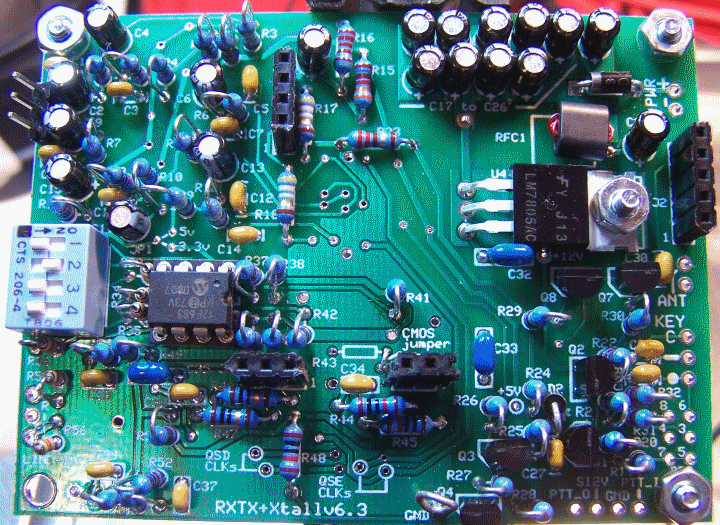
Main Board Completed
Congratulations. You have completed the main board assembly. Now it's on to the PAF board (we will use the 80/40m version) and those dreaded inductors!
By the way, if you notice you have one resistor left over out of the main board resistors, then it is OK (providing you were building the CMOS version). That left over resistor, in the CMOS version, is the 100 ohm R43 - omitted in the CMOS version.
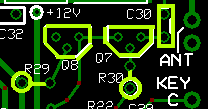
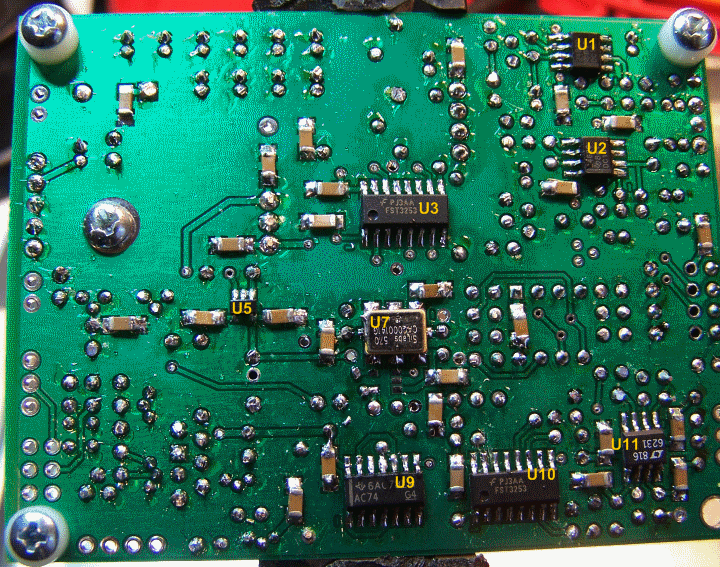
Topside
Bottomside
Testing
Current Limited Power Test
- Connect a 100 ohm resistor in series with the power line and apply 12 V dc power
- the current should be relatively low (around 120 mA or less)
- Measure the voltage WRT ground at the +5 V and at the 3.3 Vdc testpoints.
- A voltage of around 2 V dc indicates the power rails are not shorted
- Remove the current-limiting resistor. Subsequent tests in this stage are with the current-limiting resistor OUT of the circuit.
Current Draw
- current draw without limiting resistor should be < 105 mA
- Your Measurement: _______________________________
Power Rail Resistances

Set SW1 so that one of its dip switches is on (author used the 40m setting for 7.046 MHz, "0100"). Measure the resistance, WRT ground, of the three power rails:
- +12 V testpoint should read quite high, in the meg ohms.
Author measured about 7 M ohm
Your measurement: ______________ - +5 V testpoint should read about 950 ohms.
Author measured 949 ohms
Your measurement: ______________ - +3.3 V testpoint should read 9 - 10 k ohms.
Author measured 9.2 kOhms
Your measurement: ______________
This resistance value will vary, depending upon how many of the switches on SW1 are on. If none are on, the reading is ~100K. If more than one are on, the reading will be proportionately less.
Thanks to Jim WA4YWM for adding this!
Resistance at BPF Transformer Secondary Winding
If not already done, plug in the BPF Board (following results were with 80/40 BPF)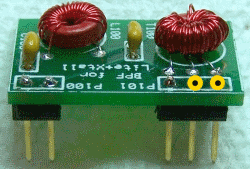
Measure the resistance, WRT ground, of the secondary windings of T100-#:
- Pin 2 of P101 should read abount 700-750 ohms.
Author measured 740 ohm
Your measurement: ______________ - Pin 3 of P101 should read abount 700-750 ohms.
Author measured 740 ohm
Your measurement: ______________
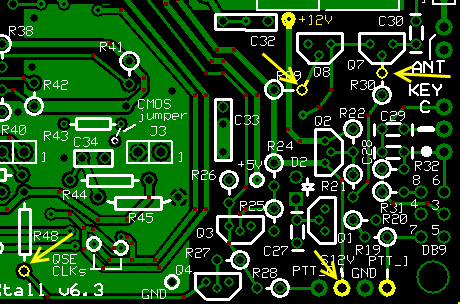
RX Muting and RX Antenna Switching
- set PTT-I to high by connecting the PTT-I pad to the 12 V test point (or to the
left-hand lead of D1) with a clip lead
(as in PTT testing)
- Measure the voltage WRT ground of the RX Mute signal at R48's bottom lead. You should get a high signal (~5 Vdc).
Your Measurement: _____________________ - Measure the voltage WRT ground at the S12V pad. You should get approximately 11 -12 Vdc.
Your Measurement: _____________________ - Measure the voltage WRT ground at the hairpin of R30 (gate of Q7).
You should get ~0 V.
Your Measurement: _____________________ - Measure the voltage WRT ground at the hairpin of R29 (gate of Q8).
You should get ~12 V.
Your Measurement: _____________________
- Measure the voltage WRT ground of the RX Mute signal at R48's bottom lead. You should get a high signal (~5 Vdc).
- set PTT-I to low by disconnecting the lead between PTT-I pad the 12 V source
- Measure the voltage WRT ground of the RX Mute signal at R48's bottom lead. You should get a low signal (~50 mVdc).
Your Measurement: _____________________ - Measure the voltage WRT ground at the S12V pad. You should get ~0 Vdc.
Your Measurement: _____________________ - Measure the voltage WRT ground at the hairpin of R30 (gate of Q7).
You should get ~12 V.
Your Measurement: _____________________ - Measure the voltage WRT ground at the hairpin of R29 (gate of Q8).
You should get ~0 V.
Your Measurement: _____________________
- Measure the voltage WRT ground of the RX Mute signal at R48's bottom lead. You should get a low signal (~50 mVdc).
RX Test in Rocky
An additional test is to run Rocky, feeding the Ring and Tip outputs to the Line In inputs of your PC's sound card.
At this stage, you can test the receiver part of the rig using your ham transmitter (or some other RF source)
- Assuming you have built the 80/40 BPF board, plug it into the jacks (J3 and J4) on the mother board
- Tack solder a stereo cable for the ring, tip, and common audio output connections:
- Plug the other end of the stereo cable into your PCs STEREO input. Note: it MUST BE STEREO; most laptops, unfortunately, do not have a STEREO line-in jack and their MIC inputs are very often just MONO.
- Use clip leads to connect pin 1 to pin 5 on J2
- insert a small wire lead into the "ANT" terminal to pick up the signal
- If you already have not done so, download and install Rocky
- Run Rocky and click on the
View > Settingsmenu - In the "settings" menu, click on the "DSP" tab
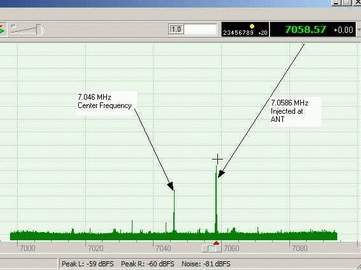
- In the "DSP" tab's "Local Oscillator" section, click on the button marked "Single Band" and type in the desired center frequency (7046000). This sets Rocky's center frequency at 7.046 MHz.
- Click on the "Audio" Tab and select your sound card (if it is not already selected) in the "I/Q Input Device" dropdown box.
- Click on OK to close the "Settings" Menu
- Using your ham transceiver (or other signal source), transmit a low power RF signal (e.g. 7.059 MHz), injected at the ANT terminal
- Power up the board
and click the
File > Start Radiomenu choice. - You should see the Rocky spectrum display resembling the image above.
- If your signal source can sweep the frequency, observe Rocky's spectrum display as the generator sweeps through the "chunk" of bandwidth centered on the center frequency.
- If you get "mirror images" of the signal, instead of the expected results, check out the image rejection troubleshooting hints.