Description of SMT Elmer Station
This station provides special ESD protection and special facilities for installing and soldering SMT ICs (the builders do their SMT work at the builder station, but can ask the SMT Elmers for guidance on that process). Builders may come here during the Divider stage and the OpAmp stage, if they are nervous about working with SMT ICs. The Elmer consults on the correct alignment, orientation and placement of the ICs on the board. The Elmer also consults with the builders at their stations on soldering of the SMT components.
Experience from the dry runs of the Buildathon suggests that the most common Elmer activity in SMT area is to "jump start" the builder:
- Demonstrate at the builder's station the soldering of the SMT Caps - do the first cap while builder watches
- Assist the builder in orienting, aligning, and "tacking" the SMT ICs - the builder then finishes soldering each pin./li>
Still, this Elmer Station will provide the SMT work facilities should they be needed for any builder
Resources
Supplies
| Item | Qty | Notes |
|---|---|---|
| spool of .015" 63/37 solder | 1 | |
| fine solder wick | 1 |
Tools (quantities are for 2 stations)
| Item | Qty | Notes |
|---|---|---|
| Temperature-controlled, grounded tip solder station with .032 or smaller tip | 2 | |
| 10X loupe or hand magnifier | 1 | |
| combo lamp/magnifier (bright lamp) | 2 | |
| solder sucker | 1 | |
| fine tweezer | 2 | |
| anti-static mat with wrist strap | 2 | |
| Panavise Jr. | 2 | |
| UNCOATED cookie sheet | 1 | (ESD protection) |
| ground wire | 1 | (for grounding cookie sheeet) |
Process
This station may be involved the builders using the equipment and facilities under the guidance of the consulting Elmer. The builder may use the station to install the 2 SMT ICs for the DIvider stage and, later, the OpAmp stage's single IC.
Items to Consult with Builders
For each IC:
- The Builder (or the Elmer) orients, aligns, and "tack solders" the IC by one of its corners.
- The Elmer then checks the tacked IC for good alignment, orientation, and snug fit to the pads. If the IC needs to be re-tacked, the Elmer advises or assists the builder to do so. The Builder should NOT continue with an IC beyond the "tacking" of one leg until the Elmer has approved the alignment and orientation!
- The builder then solders the rest of the legs
- The builder then moves on to the next IC (or back to their station)
- The Elmer remains available to review the builder's soldering
Pay Special Attention To
SMT Orientation
IC Alignment
Make sure that the builder has aligned the chip such that the "legs" all align squarely with their respective pads before moving beyond the "tack solder" step.ICs Snug to Pads
Again, prior to moving beyond the "tack solder" step, check to be sure the builder has not tacked the ic such that some or all of its legs are raised above their pads. This usually happens when the builder has put too heavy a layer of solder onto the "tack" pad.(Builder Station) SMT Cap Chip Orientation
When consulting with the builder on their cap chip soldering, make sure they orient the chips in the correct horizontal or vertical orientation.
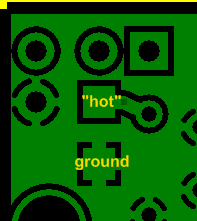
SMT Cap Chip Pads
It is important to remind the builder to tin only the "hot" pad for the SMT Chip Caps. The "hot" pad exposes minimal surface area to dissipate heat; the ground pad tends to act as a heat source and makes tinning and placement of the caps more difficult
(Builder Station) SMT Cap Chip Identification
Elmers remind builders to distinguish between 0.1 and 0.01 uF caps:
 0.01 uF caps (pads marked in yellow above)
 0.1 uF caps (pads marked in white above)
Solder Splashes
Builders must be alert to the possibility of filling up plated vias adjacent to IC and chip pads while soldering. The solder wants to leak over into those holes and will make for grief when it comes time to stuff them with component leads. Additionally, solder bridges caused by sloppy or poorly aligned soldering can affect previously tested stages.ESD
Make sure the builders follow good ESD procedures
Build Stages Supported
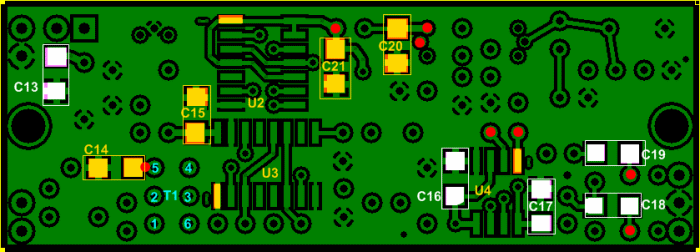
- Power Supply(one cap at builder station)
- Local Oscillator(one cap at builder station)
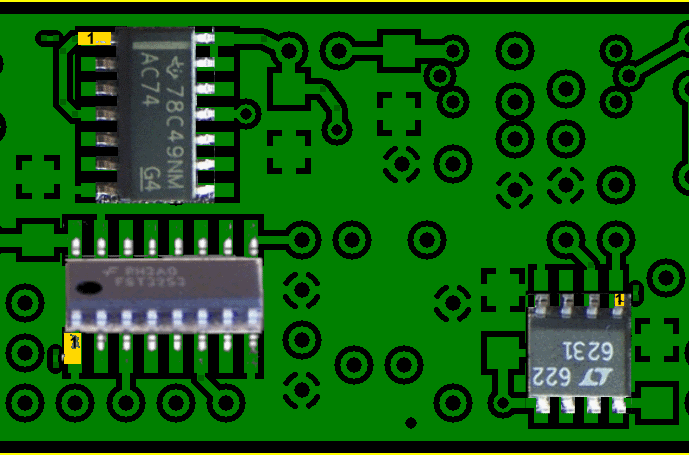
- Dividers 2 ICs: a 14 pin and a 16 pin IC; ( remainder of Caps at Builder Station)
- Op-Amps One 8-pin IC IC