Quadrature Clock Generator Introduction
General
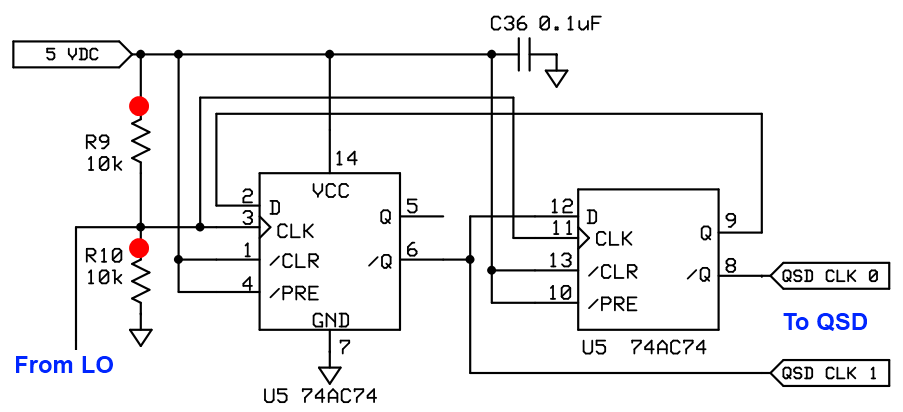
This stage divides the local oscillator output by 4 and shifts the phase of the dividend signals such that they are now one-fourth the LO frequency and 90 degrees separated in phase (i.e., in quadrature). Both signals are identical in all regards except phase. They will be used to clock the switch used in the Quadrature Sampling Detector (QSD) stage.
(go directly to build notes)Quadrature Clock Generator Schematic
(Resistor testpoints (hairpin, top, or left-hand lead), as physically installed on the board, are marked in the schematic with red dots)
(above schematic has clickable areas that can be used for navigation)
(go directly to build notes)Quadrature Clock Generator Bill of Materials
Stage Bill of Materials
(resistor images and color codes courtesy of WIlfried, DL5SWB's R-Color Code program)
| Check | Designation | Component | Marking | Category | Orientation | Notes | Circuit |
|---|---|---|---|---|---|---|---|
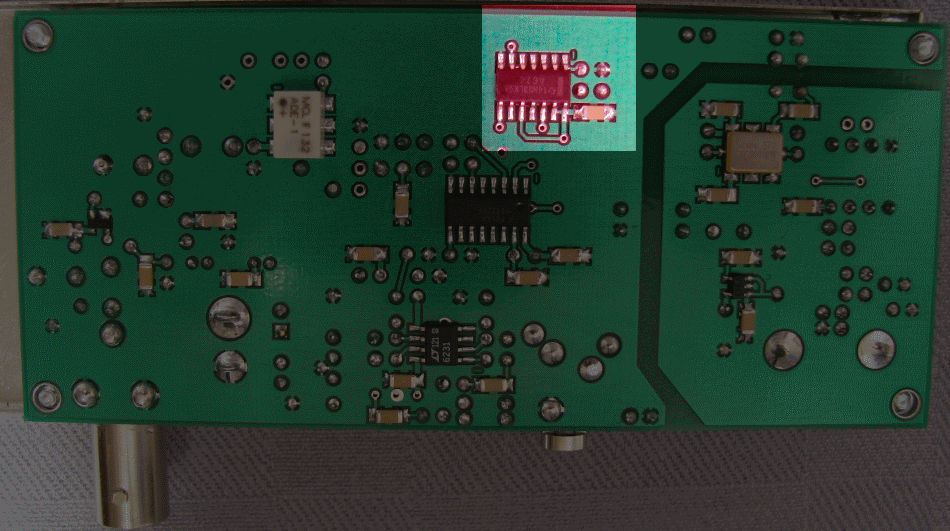
| ❏ | U05 | 74AC74 Dual D FF | 74AC74
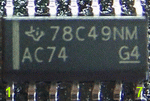 | SOIC-14 | 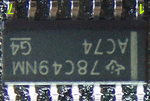 | Markings vary - look for "AC74" | Quadrature Clock Generator |
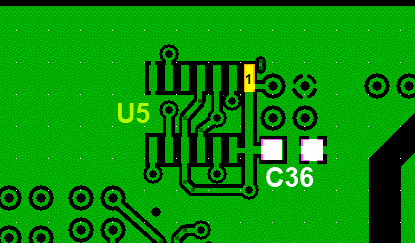
| ❏ | C36 | 0.1 uF | (smt) black stripe
 | SMT 1206 | Quadrature Clock Generator | ||
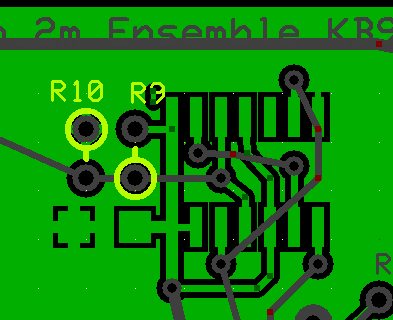
| ❏ | R09 | 10 k 1/6W 5% | brn-blk-ora-gld
 | 1/6W | Quadrature Clock Generator | ||
| ❏ | R10 | 10 k 1/6W 5% | brn-blk-ora-gld
| 1/6W | Quadrature Clock Generator |
Quadrature Clock Generator Summary Build Notes
- Install SMT Components
- Install Voltage Divider
- Test the Stage
Quadrature Clock Generator Detailed Build Notes
Bottom of the Board
Install SMT Components
| Check | Designation | Component | Marking | Category | Orientation | Notes |
|---|---|---|---|---|---|---|
| ❏ | U05 | 74AC74 Dual D FF | 74AC74
| SOIC-14 | | Take ESD precautions Markings vary - look for "AC74" |
| ❏ | C36 | 0.1 uF | (smt) black stripe
| SMT 1206 |
Top of the Board
Install Voltage Divider
| Check | Designation | Component | Marking | Category | Orientation | Notes |
|---|---|---|---|---|---|---|
| ❏ | R09 | 10 k 1/6W 5% | brn-blk-ora-gld
| 1/6W | ||
| ❏ | R10 | 10 k 1/6W 5% | brn-blk-ora-gld
| 1/6W |
Quadrature Clock Generator Completed Stage
Top of the Board
Bottom of the Board
Quadrature Clock Generator Testing
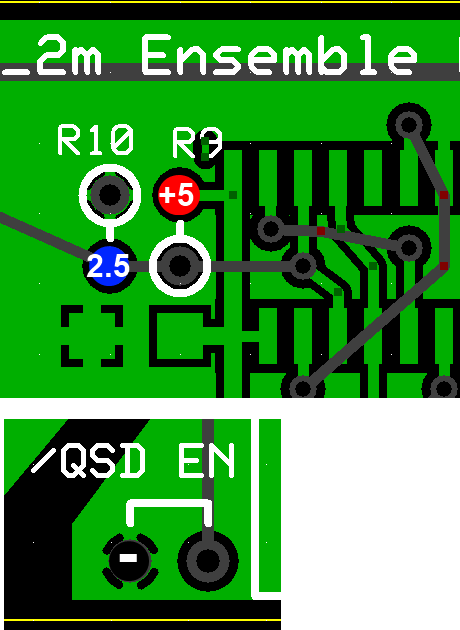
Test Voltage Divider
Test Setup
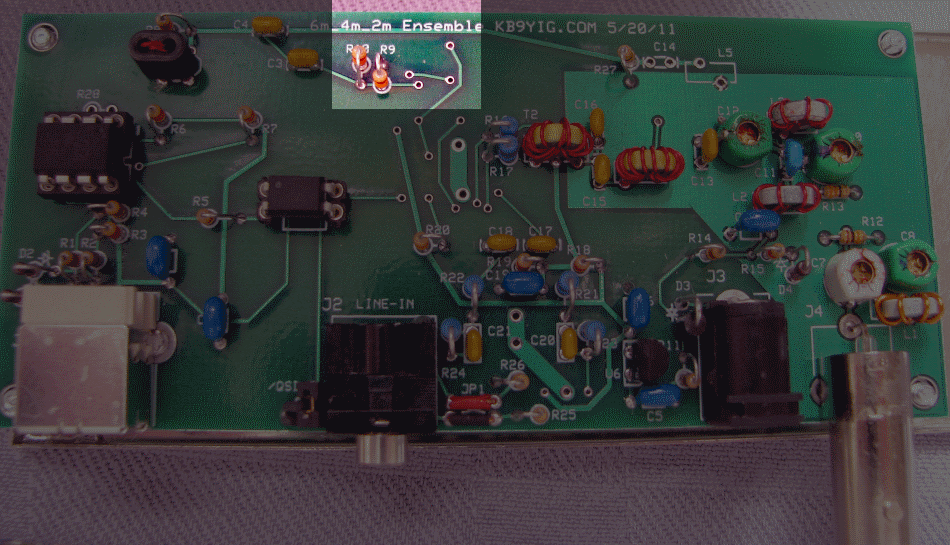
Apply USB and 12V power to the board
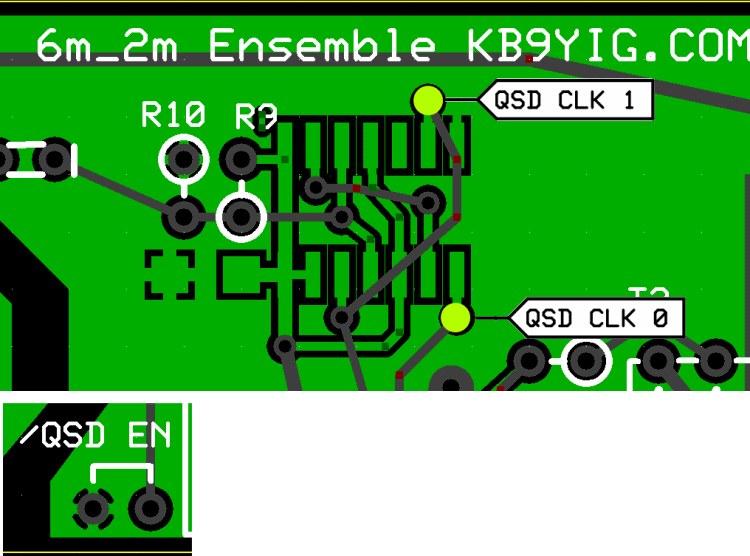
Connect the black lead of your ohmmeter to the "/QSD EN" wire at the bottom edge of the topside of the board
Probe the +5 and 2.5 V test points shown in the graphic. R9 and R10 provide a voltage divider that divides the 5V rail's voltage in half. Passing this test is essential to passing the next test and ensuring that the Quadrature Clock Generator works OK.
Test Measurements
| Testpoint | Units | Nominal Value | Author's | Yours |
|---|---|---|---|---|
| "+5" (red} at R9's hairpin lead | V dc | 5 | _______ | |
| "2.5" (blue) at R10's hairpin lead | V dc | 2.5 | _______ |
Test U5's Pin Voltages
Test Setup
It has been observed before that some digital meters are affected by the square wave signals on IC pins and do not always read correctly. The readings you get should approximate 2.5V . The best instrument may be a good oscilloscope. Just be prepared to see slightly different readings on pins 10-13 and 3-6, depending on your DMM (mine is not the best!)
Apply USB and 12V power to the board
Connect the black lead of your ohmmeter to the "/QSD EN" wire at the bottom edge of the topside of the board
From the bottom side of the board, probe pins 1-14 of U5 and note your measurements in the table below.
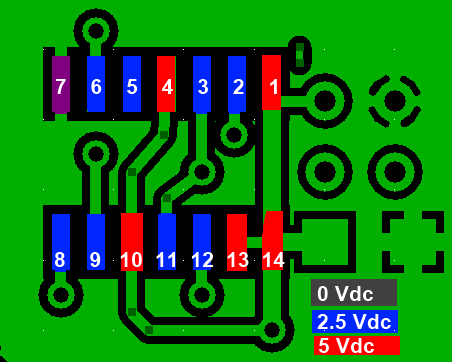
Test Measurements
| Testpoint | Units | Nominal Value | Author's | Yours |
|---|---|---|---|---|
| Pin 1 | V dc | 5 | _______ | |
| Pin 2 | V dc | 2.5 | _______ | |
| Pin 3 | V dc | 2.5 | _______ | |
| Pin 4 | V dc | 5 | _______ | |
| Pin 5 | V dc | 2.5 | _______ | |
| Pin 6 | V dc | 2.5 | _______ | |
| Pin 7 | V dc | 0 | _______ | |
| Pin 8 | V dc | 2.5 | _______ | |
| Pin 9 | V dc | 2.5 | _______ | |
| Pin 10 | V dc | 5 | _______ | |
| Pin 11 | V dc | 2.5 | _______ | |
| Pin 12 | V dc | 2.5 | _______ | |
| Pin 13 | V dc | 5 | _______ | |
| Pin 14 | V dc | 5 | _______ |
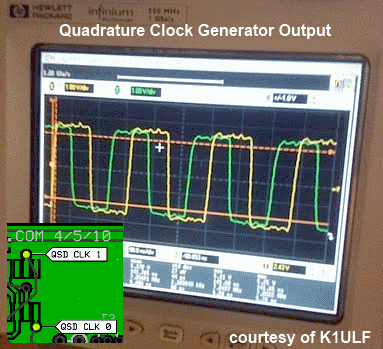
QSD Clock Signals
Test Setup
If you have a dual trace scope available, probe the two "QSD CLK (n)" test points and you should get a waveform similar to the one shown here.
Your mileage may vary, depending upon the desired center frequency you select and the quality of your scope (some scopes tend to have issues with these square waves - still, the scope should show two waveforms in quadrature at the desired center frequency).
Hint: Using the CFGR tool, select a frequency that your scope can handle. For example, the author's scope can handle a 3.5 MHz signal fairly well; that calls for a 16 MHz setting on the Local Oscillator which, divided by 4, yields the 3.5 MHz outputs of the Quadrature Clock Generator (QCG). The key here is to test that the QCG is functioning correctly
If you do not have a scope, you can use an HF RX tuned to an HF frequency, set the LO to output 4X that selected frequency, and connect a wire from the RX's antenna, and bring it close to another wire stuck in one of the "QSD CLK n" testpoints. You shoujld be able to hear the QCG's output and be pretty well-assured you have successfully completed this stage.