Local Oscillator Introduction
General
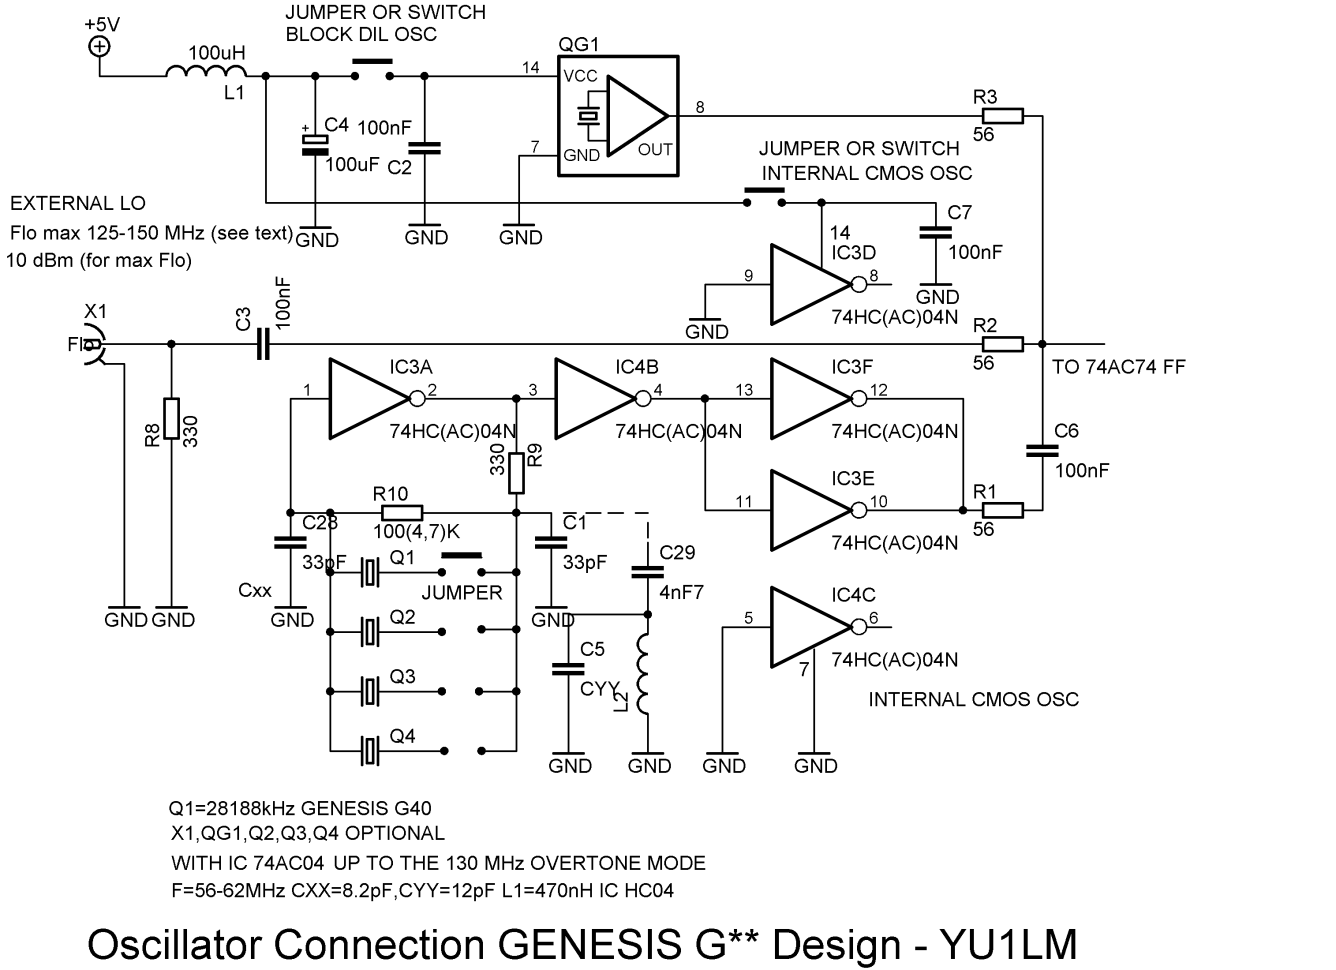
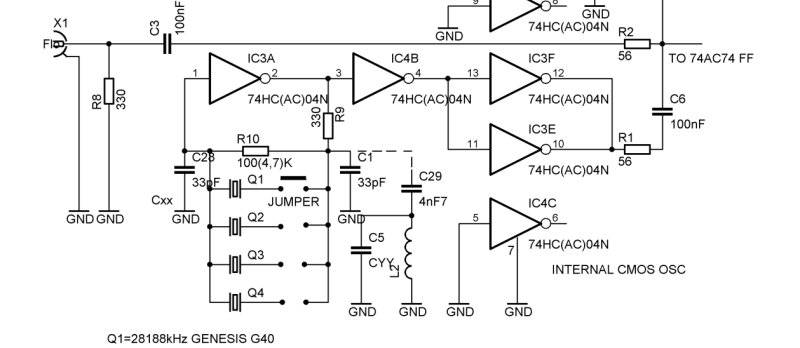
The local oscillator stage generates a 28.188 MHz signal (for quadrature clocking signals of 7.047 MHz each) using a 74HC04 hex inverter and a 21.188 MHz crystal.
The circuit is described in the schematic "Oscillator Connection Genesis G** Design".
The output of this stage will divided in the follow-on stage.
Local Oscillator Schematic
Local Oscillator Bill of Materials
Stage Bill of Materials
(resistor images and color codes courtesy of WIlfried, DL5SWB's R-Color Code program)
| Check | Count | Component | Marking | Category | Orientation | Notes | Circuit |
|---|---|---|---|---|---|---|---|
| ❏ | 2 | 330 1/4W 1% | ora-ora-blk-blk-brn
 | 1/4W | Local Oscillator | ||
| ❏ | 1 | 4K7 1/4W 1% (4.7K) | yel-vio-blk-brn-brn
 | 1/4W | Local Oscillator | ||
| ❏ | 3 | 56 1/4W 1% | grn-blu-blk-gld-brn | 1/4W | Local Oscillator | ||
| ❏ | 1 | 10 nF (.01uF) | 103
 | Ceramic | Local Oscillator | ||
| ❏ | 1 | 100 nF | 104
 | ceramic | Local Oscillator | ||
| ❏ | 2 | 33 pF | 33J | Ceramic | Local Oscillator | ||
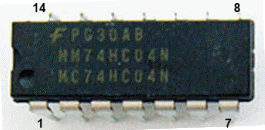
| ❏ | 1 | 74HC04 Hex Inverter |
 | DIP-14 | Local Oscillator | ||
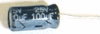
| ❏ | 1 | 100 uF/25Vdc |
 | Electrolytic | Local Oscillator | ||
| ❏ | 1 | BNC Connector Male - PCB mount | jack | NOT SUPPLIED WIT KIT | Local Oscillator | ||
| ❏ | 4 | shunt wire (cut-off lead) | misc | Local Oscillator | |||
| ❏ | 1 | 28.188 MHz | Xtal | Local Oscillator |
Local Oscillator Summary Build Notes
- Install Jumpers
- Install the IC
- Install Remaining LO Conponents
- Test the Stage
Local Oscillator Detailed Build Notes
Top of the Board

Install Jumpers
Install the four jumpers, using cut-off leads from the preceding phase. Be careful to observe the correct holes for the jumpers (see the graphic, above).
| Check | Designation | Component | Marking | Category | Orientation | Notes |
|---|---|---|---|---|---|---|
| ❏ | jmp1 | shunt wire (cut-off lead) | misc | |||
| ❏ | jmp2 | shunt wire (cut-off lead) | misc | |||
| ❏ | jmp3 | shunt wire (cut-off lead) | misc | |||
| ❏ | jmp4 | shunt wire (cut-off lead) | misc |
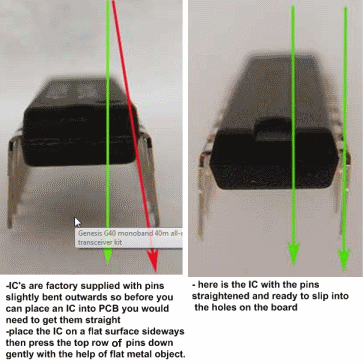
Install the IC
Install the IC before installing the remainder of the components, as it "nestles" among some components. Pay careful attention to the orientation of the IC (notch facing the top edge of the board).
Before inserting the IC, straighten the leads:
| Check | Designation | Component | Marking | Category | Orientation | Notes |
|---|---|---|---|---|---|---|
| ❏ | E359 | 74HC04 Hex Inverter |
| DIP-14 | Take ESD precautions |
Install Remaining LO Conponents
Parts placment is fairly straight-forward and localized to the top left side of the board.
The only potential point of confusion is the 100k resistor which is NOT used (a 4.7k resistor is used, instead). The change was made too late to modify the pcb's silkscreen.
Additionally, please note that the BNC connector specified in the Bill of Materials is NOT supplied with the kit. It is used only if you are planning on incorporating an external oscillator in lieu of the internal oscillator.
It is a good idea to keep a small separation between the bottom of the crystal and the top of the board when installing the crystals. One way to do this is to insert a tiny piece of folded paper underneath the crystal to act as a separator "shim".
| Check | Designation | Component | Marking | Category | Orientation | Notes |
|---|---|---|---|---|---|---|
| ❏ | E93 | 10 nF (.01uF) | 103
| Ceramic | ||
| ❏ | E351 | 100 nF | 104
| ceramic | ||
| ❏ | E86 | 100 uF/25Vdc |
| Electrolytic | ||
| ❏ | E353 | 33 pF | 33J | Ceramic | ||
| ❏ | E367 | 33 pF | 33J | Ceramic | ||
| ❏ | E186 | 56 1/4W 1% | grn-blu-blk-gld-brn | 1/4W | ||
| ❏ | E354 | 56 1/4W 1% | grn-blu-blk-gld-brn | 1/4W | ||
| ❏ | E384 | 56 1/4W 1% | grn-blu-blk-gld-brn | 1/4W | ||
| ❏ | E364 | 330 1/4W 1% | ora-ora-blk-blk-brn
| 1/4W | ||
| ❏ | E40 | 330 1/4W 1% | ora-ora-blk-blk-brn
| 1/4W | ||
| ❏ | E363 | 4K7 1/4W 1% (4.7K) | yel-vio-blk-brn-brn
| 1/4W | ||
| ❏ | E371 | 28.188 MHz | Xtal | |||
| ❏ | E180 | BNC Connector Male - PCB mount | jack | NOT SUPPLIED WIT KIT |
Local Oscillator Testing
LO Voltage Testing
Test Setup
Refer to above PCB layout for the two voltage testpoints
- Connect the power supply as in Phase 1.
- Check the pin voltages shown in the table
- If the voltages are close to 0 or +5V, then the oscillator is not working correctly.
Test Measurements
| Testpoint | Units | Nominal Value | Author's | Yours |
|---|---|---|---|---|
| pin 11 of the 74HC04 | V dc | +1.5 - +3.9 | +2.59 | _______ |
| pin 12 of the 74HC04 | V dc | +1.5 - +3.9 | +2.43 | _______ |
Frequency Test
Test Setup
If you have a frequency counter or HF transceiver, look for a signal around 28.188 MHz to verify that the oscillator is providing output.
If you have an oscilloscope, you can probe at the "LO Out" testpoint (see above) for the 28.188 MHz signal.