I2C Bus Introduction
General
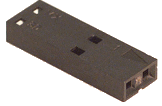
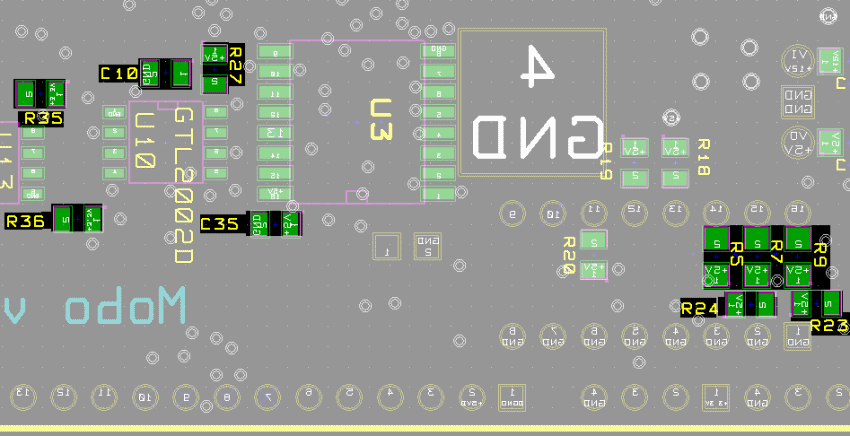
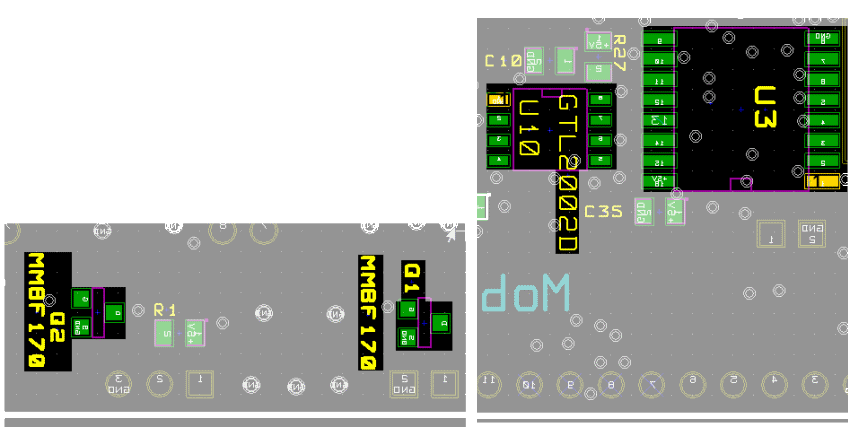
This stage sets up the I2C bus to permit control and monitoring of the various functions of the MOBO 4.3. The I2C clock and data lines from the microprocessor are bridged over to the analog side of the board via the ADUN 1251 isolator and, thence, through U10's bidirectional voltage translation to U3, the PCF8574 I2C bus to parallel port I/O expander.
Basic functioning of the bus will be tested by commaning the MOBO 4.3 to switch to TX mode, which should result in a low signal at pin 12 of U3 and a high at pin 1 of P32 (Softrock RXTX V6.3 PTT-I footer).
It is always a good idea to double check the bill of materials in this set of documentation with the official BOM on the Mobo site. Discrepancies may be introduced inadvertently, as the changes are sometimes not communicated or discovered, making timely update of this site a problem.
(go directly to build notes)I2C Bus Schematic
(Click for Full Schematic)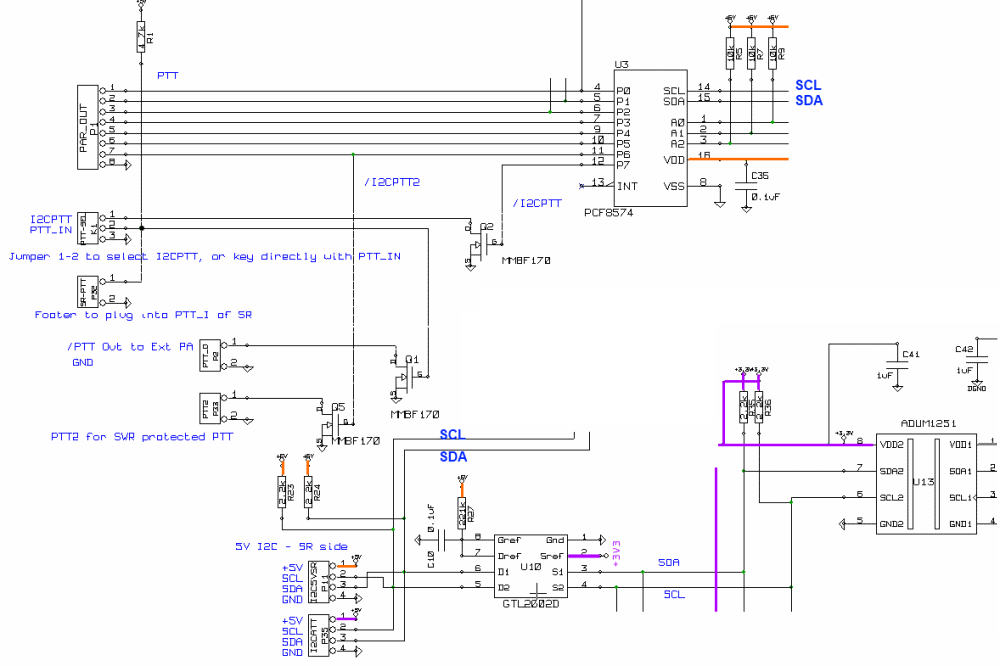
C:\Users\Rob\Documents\HamStuff\SDR\MOBO4_x\mobo43
(go directly to build notes)I2C Bus Bill of Materials
Stage Bill of Materials
(resistor images and color codes courtesy of WIlfried, DL5SWB's R-Color Code program)
| Check | Count | Component | Marking | Category |
|---|---|---|---|---|
| ❏ | 1 | header, 2-pin |
 | Header |
| ❏ | 1 | header, 2-pin RA |
 | Header |
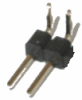
| ❏ | 1 | header, 4-pin |
 | Header |
| ❏ | 1 | header, 4-pin RA |
 | Header |
| ❏ | 1 | housing, female, 2-pin |
 | Housing |
| ❏ | 1 | housing, female, 2-pin |
| Housing |
| ❏ | 2 | 0.1 uF | SMT 0805 | |
| ❏ | 1 | 1 uF | SMT 0805 | |
| ❏ | 3 | 10 k ohm 5% | SMT 0805 1/8W | |
| ❏ | 2 | 2.2 k ohm 5% | SMT 0805 1/8W | |
| ❏ | 2 | 2.2 k ohm 5% | SMT 0805 1/8W | |
| ❏ | 1 | 221 k ohm 5% | SMT 0805 1/8W | |
| ❏ | 1 | PCF-8574 remote I/O Expander | PCF-8574
 | SOIC-16 |
| ❏ | 1 | GTL2002D 2 bit bidir voltage xlator | GTL2002D
 | SOIC-8 |
| ❏ | 3 | MMBF170LT1G | MMBF170LT1G
 | SOT-23-3 |
I2C Bus Summary Build Notes
- Install Bottomside Ics and Transistors
- Install Bottomside Static Components
- Install Topside Components
- Install Pins
- Test the Stage
I2C Bus Detailed Build Notes
Bottom of the Board
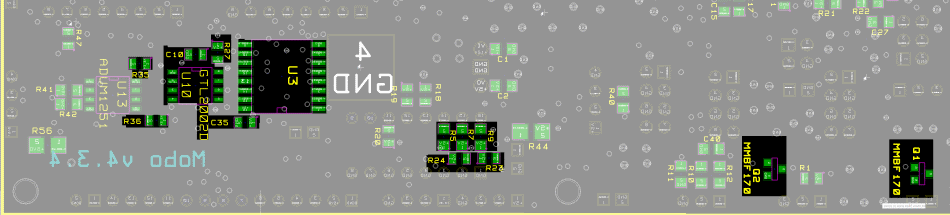
Install Bottomside Ics and Transistors
| Check | Designation | Component | Marking | Category | Orientation | Notes |
|---|---|---|---|---|---|---|
| ❏ | Q01 | MMBF170LT1G | MMBF170LT1G
| SOT-23-3 | Take ESD precautions | |
| ❏ | Q02 | MMBF170LT1G | MMBF170LT1G
| SOT-23-3 | Take ESD precautions | |
| ❏ | U03 | PCF-8574 remote I/O Expander | PCF-8574
| SOIC-16 | Take ESD precautions | |
| ❏ | U10 | GTL2002D 2 bit bidir voltage xlator | GTL2002D
| SOIC-8 | Take ESD precautions There is a beveled edge on the side that pin 1 is on. |
Install Bottomside Static Components
| Check | Designation | Component | Marking | Category | Orientation | Notes |
|---|---|---|---|---|---|---|
| ❏ | C10 | 0.1 uF | SMT 0805 | |||
| ❏ | C35 | 0.1 uF | SMT 0805 | |||
| ❏ | R05 | 10 k ohm 5% | SMT 0805 1/8W | |||
| ❏ | R07 | 10 k ohm 5% | SMT 0805 1/8W | |||
| ❏ | R09 | 10 k ohm 5% | SMT 0805 1/8W | |||
| ❏ | R23 | 2.2 k ohm 5% | SMT 0805 1/8W | |||
| ❏ | R24 | 2.2 k ohm 5% | SMT 0805 1/8W | |||
| ❏ | R35 | 2.2 k ohm 5% | SMT 0805 1/8W | see note #4 | ||
| ❏ | R36 | 2.2 k ohm 5% | SMT 0805 1/8W | see note #4 | ||
| ❏ | R27 | 221 k ohm 5% | SMT 0805 1/8W |
Top of the Board

Install Topside Components
| Check | Designation | Component | Marking | Category | Orientation | Notes |
|---|---|---|---|---|---|---|
| ❏ | Q05 | MMBF170LT1G | MMBF170LT1G
| SOT-23-3 | Take ESD precautions | |
| ❏ | C41 | 1 uF | SMT 0805 |
Install Pins
| Check | Designation | Component | Marking | Category | Orientation | Notes |
|---|---|---|---|---|---|---|
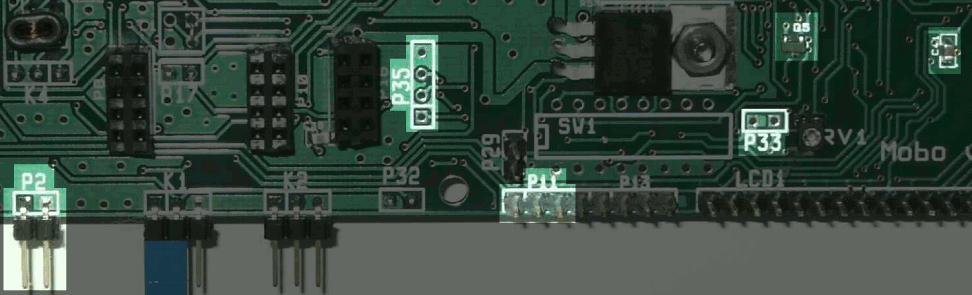
| ❏ | P02 | header, 2-pin RA |
| Header | External PA input must be short to ground to activate type. Max current 500 ma, Max voltage 60V | |
| ❏ | P11 | header, 4-pin RA |
| Header | I2C connector. For connecting to Marc's Switched LPF (optional) | |
| ❏ | P02_Mate | housing, female, 2-pin |
| Housing | For keying external PA. External PA input must be short to ground to activate type. Max current 500 ma, Max voltage 60V | |
| ❏ | P33_Mate | housing, female, 2-pin |
| Housing | ||
| ❏ | P33 | header, 2-pin |
| Header | Similar to P2, but this will not activate in high SWR conditions | |
| ❏ | P35 | header, 4-pin |
| Header | I2C connector For connecting to Preamp/Attenuator board (optional) |
I2C Bus Completed Stage
Top of the Board
Bottom of the Board
I2C Bus Testing
I2C Bus Voltages
Test Setup
Without a osclloscope you could do some static DC measurements. The I2C bus is open collector (or drain) driven; i.e. each device pulls the Data or CLK bus to ground and using the I2C buss pullup resistors for the high level.
Measure on each of the I2C buses and see that the pullups are all there. Then you can try and short to ground and see the I2C signal propagate through the isolator/level translator.
Measure dc voltage with respect to ground
Test Measurements
| Testpoint | Units | Nominal Value | Author's | Yours |
|---|---|---|---|---|
| P24: Pins 1,2,3 wrt Pin 4 | Vdc | +5 | TBD | _______ |
| P13: Pin 1,2,3 wrt Pin 4 | Vdc | 3.28 | TBD | _______ |
| P11: Pins 1,2,3 wrt Pin 4 | Vdc | +5 | TBD | _______ |
Integrity of U10 (GTL2002) and U13 (ADuM1251)
Test Setup
Once you have varified the pullup resistors are correct, short to ground each of the I2C lines (starting at the processor (digital) end) and see how it flows through the Isolator (ADUM 1251) and level translator(GTL2002D).
You should use a small resistor to ground (maybe 100 ohms) in case you have a short on one of the buss lines to power :)) Shorting to power is probably bad for any device trying to drive the buss; i.e. make sure you don't short to power by mistake. Using the 100ohm resistor will swap the level pulled up by the 2.2K resistors. Or just use a current limited supply for testing; and set current trip point just above nominal running current.
Note: From P24 to P13, through the ADUM 1251, the Clock line (SCL) is unidirectional; the data line (SDA) is bidirectional
Test Measurements
| Testpoint | Units | Nominal Value | Author's | Yours |
|---|---|---|---|---|
| (Digital side) Ground P24-2, measure P11-2 | Vdc | 0 | TBD | _______ |
| (Digital side) Ground P24-2, measure P13-2 | Vdc | 0 | TBD | _______ |
| (Digital side) Ground P24-3, measure P11-3 | Vdc | 0 | TBD | _______ |
| (Digital side) Ground P24-3, measure P13-3 | Vdc | 0 | TBD | _______ |
| (Analog Side) Ground P13-2, measure P11-2 | Vdc | 0 | TBD | _______ |
| (Analog Side) Ground P13-2, measure P24-2 | Vdc | +5 | TBD | _______ |
| (Analog Side) Ground P13-3, measure P11-3 | Vdc | 0 | TBD | _______ |
| (Analog Side) Ground P13-3, measure P24-3 | Vdc | 0 | TBD | _______ |
| (SR side) Ground P11-2, measure P13-2 | Vdc | 0 | TBD | _______ |
| (SR side) Ground P11-2, measure P24-2 | Vdc | +5 | TBD | _______ |
| (SR side) Ground P11-3, measure P13-3 | Vdc | 0 | TBD | _______ |
| (SR side) Ground P11-3, measure P24-3 | Vdc | 0 | TBD | _______ |
Test Basic I2C Functioning
Test Setup
Plug the MOBO 4.3 into the SR RXTX V6.3 and power up the Softrock
Connect the MOBO.s USB cable to the PC
Run a program to "command" the MOBO to switch PTT ON (e.g., Mobo Control (see bottom of page for latest version)
Measure the voltage at the testpoints
Test Measurements
| Testpoint | Units | Nominal Value | Author's | Yours |
|---|---|---|---|---|
| /I2CPTT wrt ground (TX OFF) | hi/lo | HIGH | tbd | _______ |
| /I2CPTT wrt ground (TX ON) | hi/lo | LOW | tnd | _______ |
| P32 Pin 1 wrt P32 Pin 2 (TX OFF) | hi/lo | LOW | _______ | |
| P32 Pin 1 wrt P32 Pin 2 (TX ON) | hi/lo | HIGH | _______ |
Test Frequency Control
Test Setup
With the MOBO still plugged into the powered RXTX V6.3, run the programmed test to validate that the MOBO can control the RXTX V6.3's SI570 local oscillator.
Measure the frequency of the LO output (you can take a loose insulated wire out of your HF rig's antenna and place it close to the divider chip on the RXTX V6.3 and then see if you are receiving signals at the specified center frequency).
Test Progran Requirements
Test Setup
- Program should allow user to specify a desired center frequency and then command the SI570 to generate 4X that frequency via the I2C bus.
- Program should allow user to toggle PTT on and off via the I2C bus.