Quadrature Sampling I/O Introduction
General
This stage completes the circuitry for input of the RXTX V6.3's Quadrature Sampling Detector (QSD) results and the Quadrature Sampline Exciter (QSE) results into the PTT selection stage.
It is always a good idea to double check the bill of materials in this set of documentation with the official BOM on the Mobo site. Discrepancies may be introduced inadvertently, as the changes are sometimes not communicated or discovered, making timely update of this site a problem.
Theory of Operation
The RXTX V6.3 still is responsible for the basic SDR hardware functions of quadrature sampling detector (QSD) and quadrature sampling exciter (QSE).
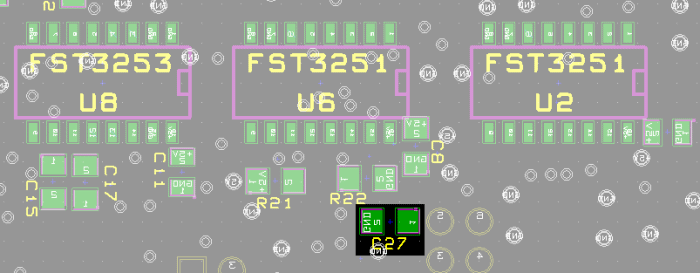
The Softrock's QSD hardware receives its RF signals, switched from the antenna at P17 via the select logic of U8, through transformer T3 and thence to plug K4 (in the place of the output from the RXTX's original bandpass filter board). These signals then appear at the Softrock;s Mixer stage to be converted down to the baseband I and Q signals that are fed to the PC's soundcard.
The Softrock's QSE stage upconverts the transmit I and Q signals from the PC's soundcard into RF. These QSE outputs from the Softrock are introduced to the MOBO via P19 and transformer T4 into the PTT select logic (U8) and on to the driver transistor's base (Q6).
The design provides for the insertion of a pre-amp/attenuator board into the line from P17 (antenna). However, that functionality is not covered in these notes.
(go directly to build notes)Quadrature Sampling I/O Schematic
(Click for Full Schematic)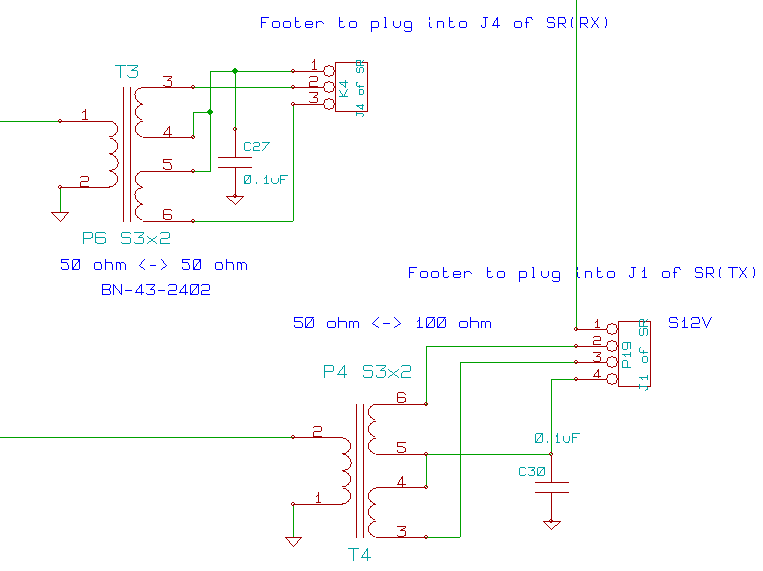
C:\Users\Rob\Documents\HamStuff\SDR\MOBO4_x\mobo43
(go directly to build notes)Quadrature Sampling I/O Bill of Materials
Stage Bill of Materials
(resistor images and color codes courtesy of WIlfried, DL5SWB's R-Color Code program)
| Check | Count | Component | Marking | Category |
|---|---|---|---|---|
| ❏ | 1 | BN-43-2402 (no markings!) | none
 | Binocular core |
| ❏ | 1 | BN-43-2402 (no markings!) | none
| Binocular core |
| ❏ | 1 | Magnetic Wire, enameled #30 | Magnetic | |
| ❏ | 1 | 0.1 uF | SMT 0805 |
Quadrature Sampling I/O Summary Build Notes
- Install Bottomside Capacitor
- Wind and Install Transformers
- Test the Stage
Quadrature Sampling I/O Detailed Build Notes
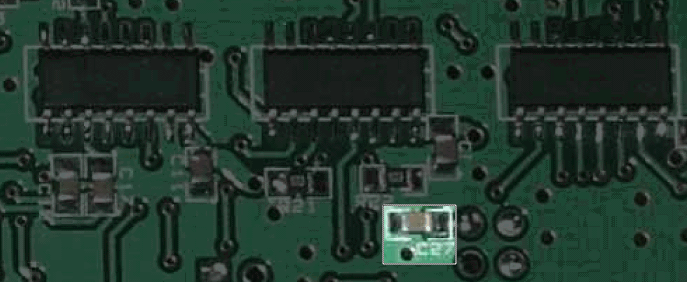
Bottom of the Board
Install Bottomside Capacitor
| Check | Designation | Component | Marking | Category | Orientation | Notes |
|---|---|---|---|---|---|---|
| ❏ | C27 | 0.1 uF | SMT 0805 |
Top of the Board
Wind and Install Transformers
Both transformers, T3 and T4, are wound with #30 wire onto BN43-2402 binocular cores. You can calculate the wire-length required for a given number of turns using this handy calculator (tx to Dohn N8EWY)
For a binocular core, each pass where the wire ends up at the same side where it started the pass counts as a turn
Exercise care in winding the binocular cores to direct the wire into each core hole so that the hard material of the core does not scrape off portions of the wire�s enamel insulation. (It may be advisable to lightly spin with one�s fingers a small drill bit in each of the binocular core hole openings to put a smooth chamfer at both ends and to remove sharp edges that may cut through the enamel insulation of a wire.)
The builder may want to review the materials provided in the build notes for the PA/Filter stage of the RXTX V6.3 (concerning winding and installing binocular transformers).
Transformer T3 - QSD RF Input
T3 (50 to 50 ohms) = P6 S3x2: There are two windings, primary (P) and secondary (S).
- Primary (P) is 6 turns single #30 wire (~7").
- Secondaries (S) are 3 turns #30 (~7"), bifilar .
- There are various ways of winding, but it may be easier to do the following:
- Do the bifilar winding first. After doing the 3 turns bifilar secondaries, cut the leads short, to about 1/2". Use an ohmmeter to identify which leads are paired and use a piece of colored insulation or other means to identify and distinguish the sets of secondary windings.
- Then do the Primary, leaving the leads long, say 1". This way, you can tell which is Primary and which is Secondary.
Transformer T4 - QSE RF Output
T4 (50 to 100 ohms) = P4 S3x2: There are two windings, primary (P) and Secondary (S).
- Primary is 4 turns single #30 wire (~5").
- Secondaries are 3 turns #30 (7"), bifilar.
Installing the Transformers
The builder may wish to review the transformer installation instructions in the Softrock HF BPF kit to see graphically how binocular transformers are wound and installed.
When you have completed the windings you will have - for each transformer - one set of primary leads and two sets of secondary leads. There will, thus, be three wires coming out of each side of the binocular core: one primary lead (P) and two secondary leads (S1 and S2). There should be continuity between the S1-S1 leads and also continuity between the S2-S2 leads.Carefully remove the insulation from all leads up to within an eighth of an inch from the core (to avoid shorts) and lightly tin the leads
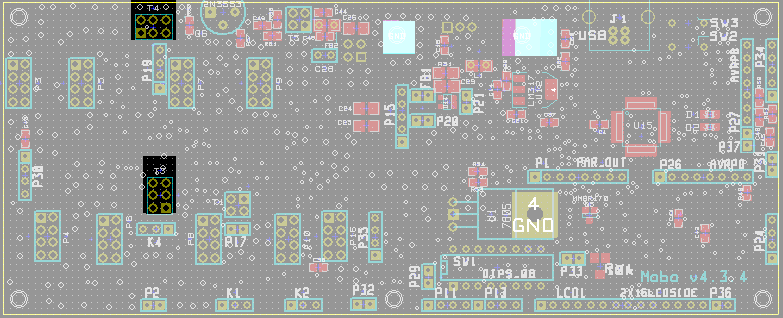
Mount the transformer and its leads according to the graphic below. The leads should allow for the transformer to "stand off" from the board just a tiny amount.
Solder the leads from the bottom of the board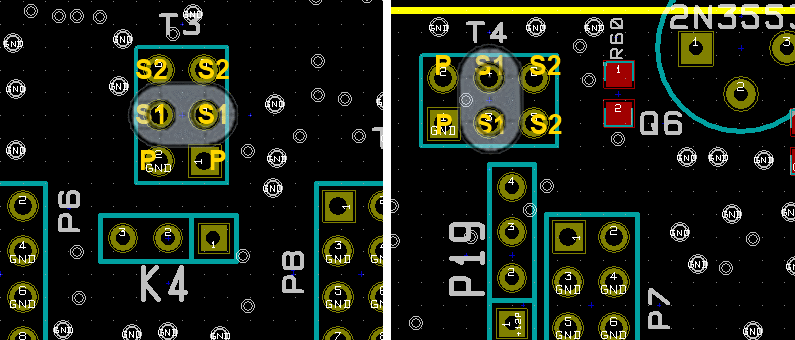
Quadrature Sampling I/O Completed Stage
Top of the Board
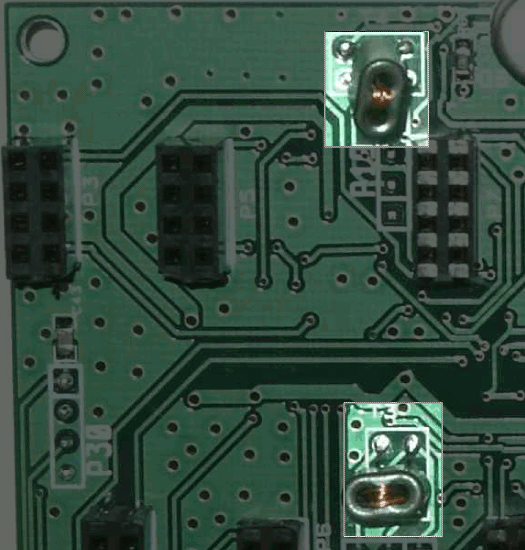
Bottom of the Board
Quadrature Sampling I/O Testing
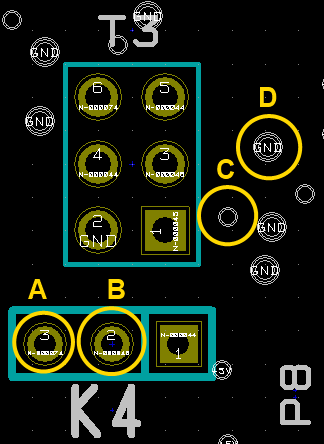
T3 Continuity
Test Setup
Board does not need power for this test. This tests the soldering of the leads of T3 by testing for continuity at points other than the immediately soldered leads.
Test Measurements
| Testpoint | Units | Nominal Value | Author's | Yours |
|---|---|---|---|---|
| A to B | Ohm | 0 | TBD | _______ |
| C to D | Ohm | 0 | TBD | _______ |
T4 Continuity Test
Test Setup
Similarly, test the continuity for T4
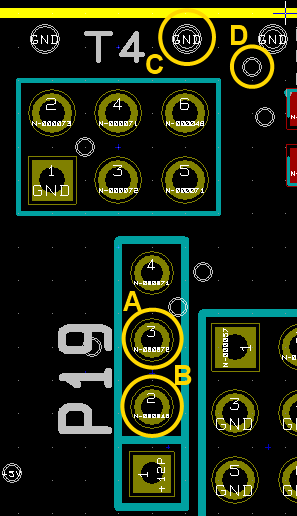
Test Measurements
| Testpoint | Units | Nominal Value | Author's | Yours |
|---|---|---|---|---|
| A to B | Ohm | 0 | TBD | _______ |
| C to D | Ohm | 0 | TBD | _______ |